My passions lie in the beauty industry (since 1998) & the Craft industry (since childhood, but truly re-ignited in 2010).
Beauty & Craft inspiration, product reviews, and how-to's, as well as general life stuff..
Hubby & I started dating 22 years ago today. It's a long story and if anyone is interested I'll tell it, but today I just wanted to share some pics.... In no particular order whatsoever.
22 Pics:
Not one a year, these are just some of what's on my computer.
2006ish. We lived in Grainger Co at the time, and spent a lot of time at the parks.
2003, Our Wedding.
2009.
Also 2009.
2010.
2010.
2011.
2011 or 12.
2012.
2012ish.
2013.
2013.
Our first Disney trip 2013.
2013?
2002, our engagement pic.
2013.
2012?
2018, our return to OBX... the trip that started it all (18 yrs prior).
In part one I was focusing on my face products, and all my lip products. This series is more of a clean up & reorganize than it is a declutter, though I did get rid of a few items.
I expected to declutter a bit more in part two (eyeshadow palettes) but, as you'll see that wasn't the case.
Actually, it's probably more of a Makeup Collection Series, with a few declutters during the process...
This time I decided to do a combo video/pics, but focused more on the video. (My first talking video!) I think it turned out well, let me know your thoughts in the comments below!
Over all I achieved my goal of re-organizing the drawers.
Declutters!
Over all I kept the 77 mentioned in the video + 6 on the July shelf.
I decluttered 6.
So I decluttered approximately 7.23% of my eyeshadow collection!
All cleaned up:
How do you think I did? Let me know in the comments.
I missed blogging last week, and was excited to get back in the craft room again. (Dog Sitting Bubbles was fun though! Check out my other social media for pics!)
Today I'm going to make earrings from DT Leather. It was my first time using it & it cut so well! I originally chose more pressure and while that worked fine it seems like it may have been too much, so when I went back for a second cut I did default pressure. That worked flawlessly! I was happily surprised, and wish I'd have bought more. (I did get 2 rolls of each, blue, black, brown, and white.)
{Online shows and says red, but in store it is a light brown. This may have changed since I purchased.}
Supplies:
Cricut Machine (I used my Explore Air 2 for this, any cutting machine that can cut faux leather will work.)
Fine Point Blade
Fabric Grip/Pink mat (The Standard/Green may have worked, but I didn't try it.)
Brayer
DT Leather
HTV (I just used scraps.)
Weeding Tool
Cricut Easy Press Mini (An iron or your standard press would work if you don't have a mini.)
Jump Rings (4)
Earring Findings (4)
Earring SVG (There are tons in Design Space, however the SVG files I used for these 2 pair are from Makers Gonna Learn.)
Pliers (I like to use two pair to separate the jump rings.)
How-To:
I chose to go with the blue, incase it didn't work well. I was more willing to waste this color material.
Adhere the materials to the mat, This is where that brayer tool come in handy, to get out any bumps, and make sure the faux leather is well stuck.
The SVG's I'm using. This short video shows loading the mat into the Cricut, which settings I chose*, and the actual cutting process of the leather.
*As stated above I decided to use default pressure on my second cut. (When I decided to do an additional set of tear drop, for extra support, and dual sided earrings.)
Look how well that Dollar Tree faux leather cut! If you wanted you could add your jump rings & findings here and have a nice pair of earrings.
I used the negative left over, and flipped it to use on the other earring. Perfect fit, with less work.
HTV I used, scrap red, unknown brand.
I did approximately 15 seconds each on the lowest setting. That seemed to work out great!
Tools!
First pair finished!!
For the second pair, I probably should have use something like a fusible web*, bonding tape, or fabric glue, but all I had on hand was hot glue, or ATG. So I figured hot glue was best out of the two. Fusible web would be the way to go I believe.
Fusible webbing is a sticky bonding that adheres two fabrics together. It comes in many different brands, each being slightly different.
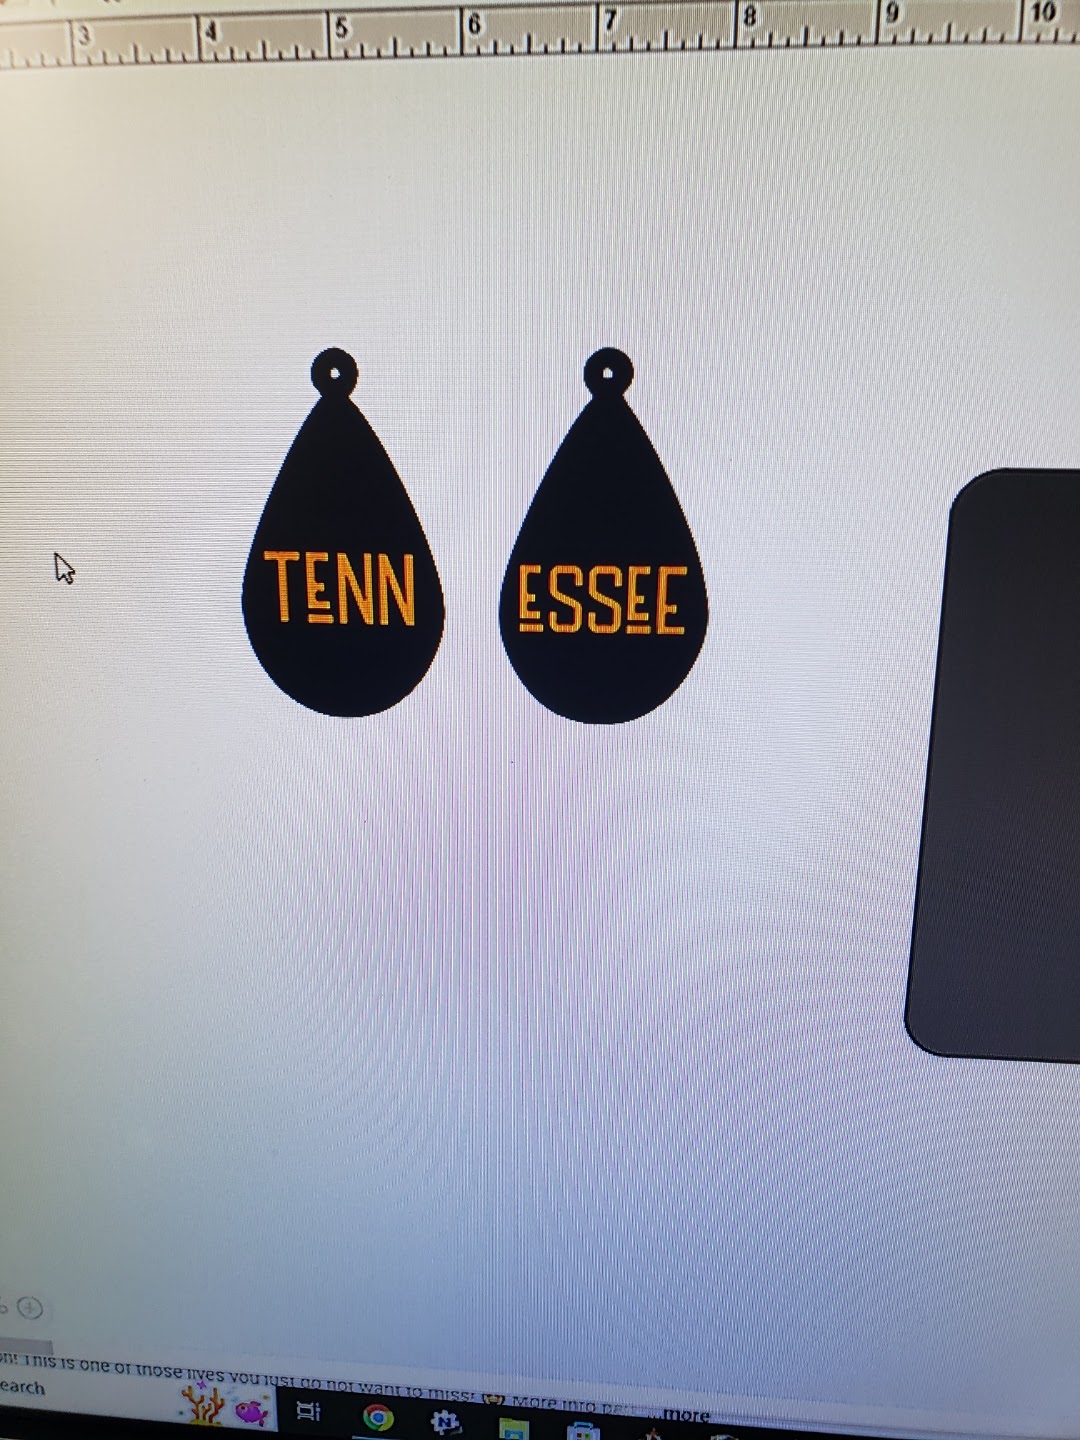
The font used here is "Handler" from dafont. (Font license available here.) The image is a modified SVG (HOME, with the O being the TN Tristar). I can't remember where I got the SVG from.
Used the square image to align the word across both earrings.
Cutting!
I used the mini press again to adhere the HTV on all four pieces.
The hot glue didn't do terrible, but fusible web/ heat 'n bond would have been better.
Dual sided.
Both pair completed!
Front & back.
Do you have any questions? Need to see something in further detail? Let me know in the comments below!