Hey Y'all!
Sorry I skipped Friday's blog. I completely forgot about it. If you're interested in seeing what I've been doing (craft wise) I post to TikTok at least 3 times a week, and most other social media at least twice. You can find all my links here:
For today's blog I'm going to create a Faux Leather Keychain using Dollar Tree Leather & Glow-in-the- Dark HTV!!
Supplies:
(All links are direct to product where applicable. None are affiliate links.)
Cutting Machine, I'm using my Cricut Explore Air 2
Cut File/SVG- I'll share the one I'm using further down the blog.
Cutting Mats (I'd suggest the green standard grip for the HTV even though I used the blue light grip.)
Heat Press/Iron- For this project I've used my Easy Press Mini
Adhesive- I've used what I had on hand, which is Heat 'n Bond Tape.
Optional- Brayer, I do like this tool to adhere the leather to the mat.
On with the How To:
1) Open up Design Space, New Project. Search for the type of image you'd like. I went with a tent/camping theme.
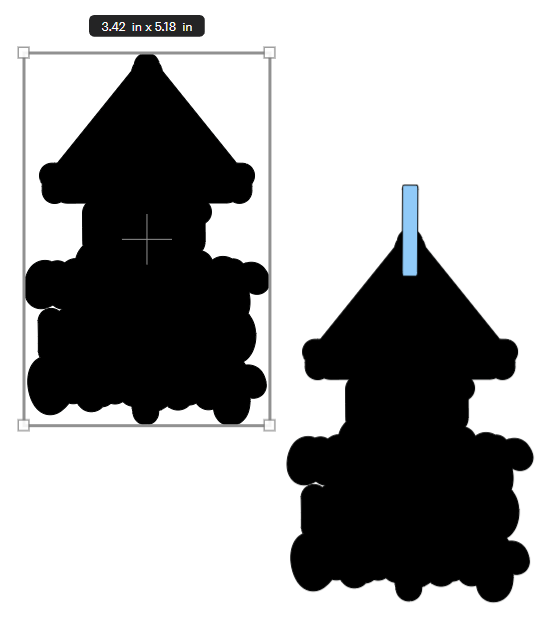
The glow in the dark part.


So I lessened it to .15 however there is blank spaces that then need contoured out.


Contour is easily done here with the Hide All option.


6) Duplicate the bottom leather piece for our keychains backside.


Be sure to mirror if you're using HTV, select your material type, and prep your mat.


12) Prep mat #2.
The faux leather does not need mirrored.


*TIP*
I always check that the material has cut all the way through BEFORE unloading the mat. If it hasn't you can immediately recut the image by clicking the cut button.


19) Adhere your two sides. I'm using a heat activated adhesive, so I need to cover/protect the HTV and heat press them together.
20B) Admire your work!

Questions? Leave them in the comment section below!
Have a great day,
Craftin' Wife
No comments:
Post a Comment
Hey Y'all!
Have a great day!