My passions lie in the beauty industry (since 1998) & the Craft industry (since childhood, but truly re-ignited in 2010).
Beauty & Craft inspiration, product reviews, and how-to's, as well as general life stuff..
*If you plan to sell your creations be sure to check the commercial licenses, and policies from each vendor/site/seller, also know the licensing laws for characters/shows/movies, etc.*
DS on PC-
Let's start from the beginning, and do a quick download of an SVG:
This SVG is free for personal use, and can be found at caluya design, linked above.
Continue through the checkout process, then this will pop up:
Click to download.
My files go right into my downloads folder on my PC.
Right click to bring up the menu, then click extract:
The extracted files will then appear, you'll click on this folder from DS to access the images in the folder.
Now let's get that design into Design Space and onto our canvas:
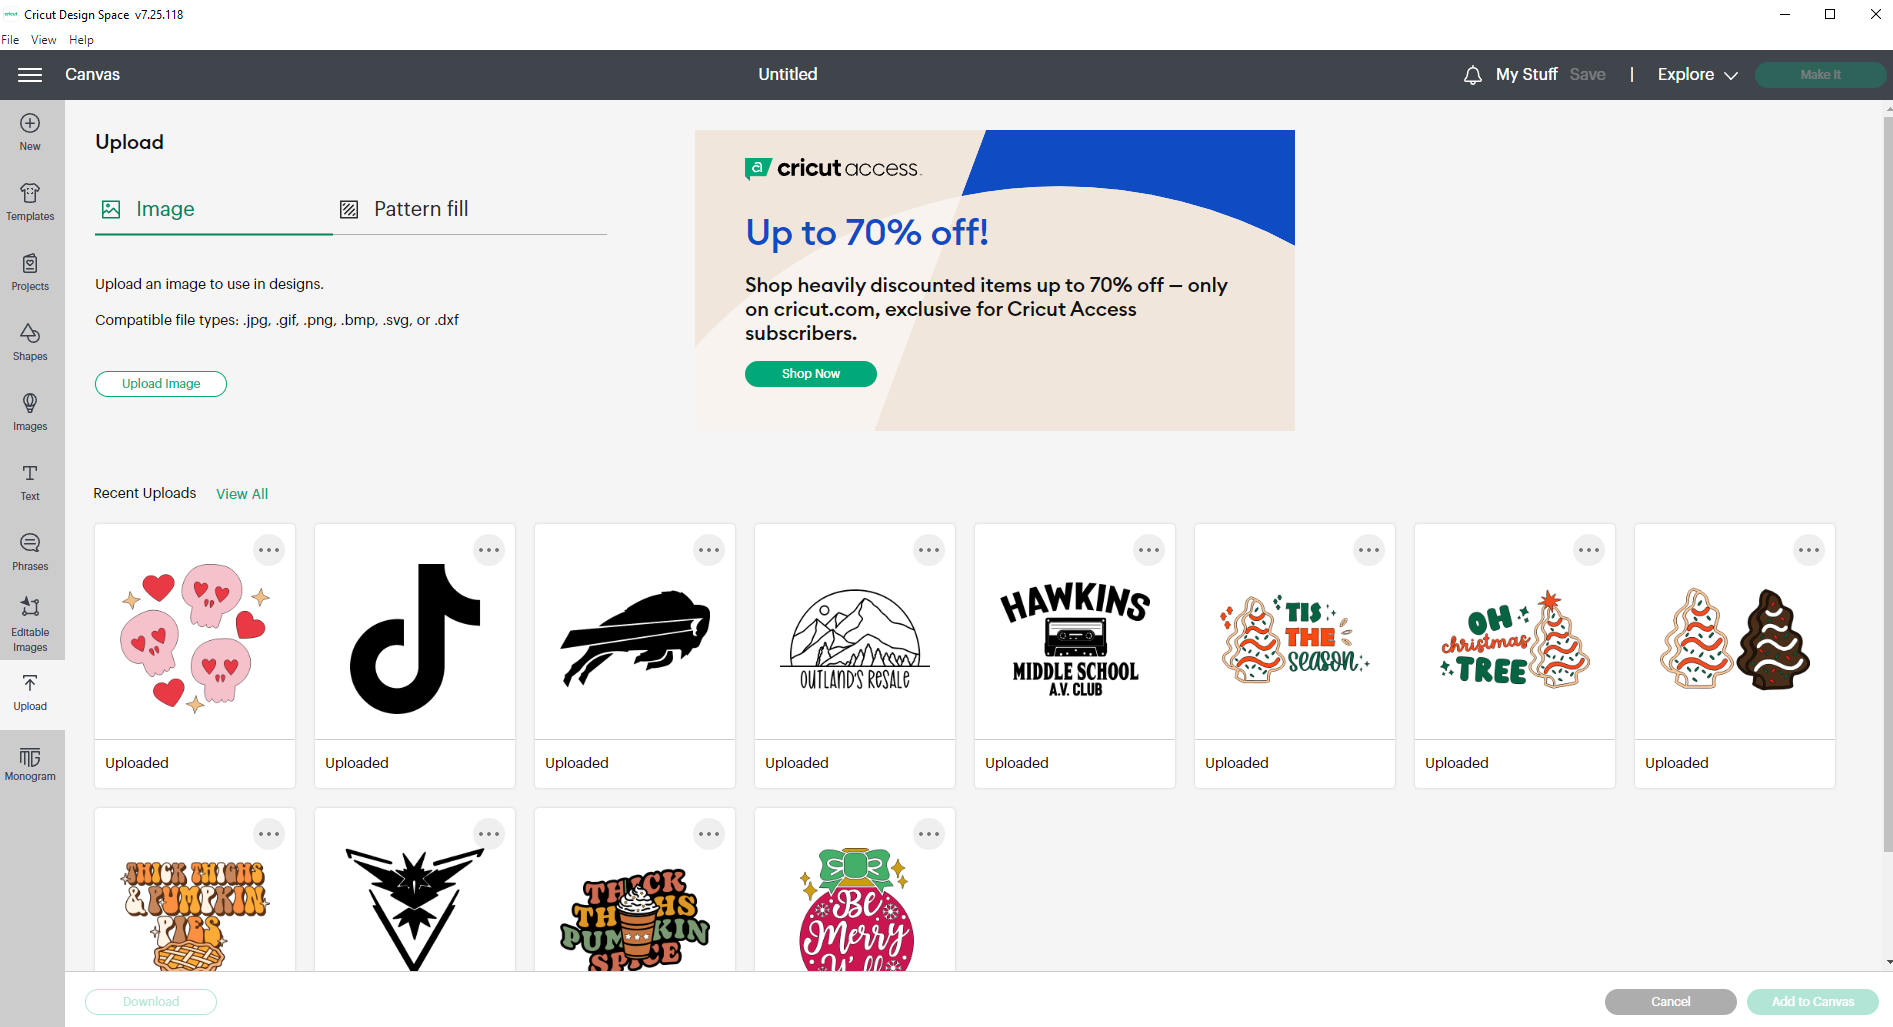
From the canvas, click on Upload-
This screen will appear, with all your previously uploaded images. The Upload button is on the left.
Here you can either drag & drop, or browse for the file you want:
Once we click on that folder, and it opens up we double click the image (SVG with the symbol on the bottom right) and it's imported to Design Space.
Some files may need cleaned up, or the background removed, that would be done here. All those tools are to the left.
For example, I used this picture from a previous blog already on my PC. I also use this process in the Android section below.
This is a poor image to attempt this with, but you can see the editing options, and if I did nothing to it the cut option is just a rectangle.
This is also where some images will give you either a CUT or PRINT option, you'll see a small preview like you do here:
One we click the upload button our image is available and we can add it to our canvas:
That's it! We're ready to create with this image.
There are a lot of possibilities with quality files/images/SVGs.
In the Android portion I show cleaning an image up, and it's hard to see in the small photos, but this google searched image just isn't cutting it. The lines are jagged, and the image just wouldn't be a nice/clean cut. I knew that going in, it's just an image from a clipart search, and I deleted it after the How-To. It works for our intended purpose though.
Image Types (Supported by Cricut DS):
SVG images are the most common type of cut file to use with Cricut Design Space. SVG stands for “scalable vector graphic”. That means you can make the SVG image as large or small as you want, without it looking pixelated or blurry.
PNG stands for Portable Network Graphics. It’s a raster image file type. This means that all PNG images and graphics are made up of pixels. Therefore they can’t be scaled to any size as vector graphics can.
JPEG is a commonly used method of lossy compression for digital images, particularly for those images produced by digital photography.
DXF is short for Drawing Exchange Format or Drawing Interchange Format and is a type of vector file. Engineers, designers and architects often use the DXF.
You can upload your very own original art to Cricut Design Space too! Whether you've drawn something on a piece of paper or digitally, save it as either a JPG, PNG or SVG file an import it in the same way as you would a downloaded image.
Android:
As previously stated I hardly ever work from my phone, and really wouldn't suggest it if you have another option.
Again from the canvas-
Upload is at the bottom, toward the middle.
Far less options here:
Our googled image:
Using the remove tool (very first tool at the bottom of the screen) we'll click on/remove all the white bits. If we didn't we'd end up with a square block like in the example above (in the PC section).
Still clicking...
Once that's finished we'll chose our operation type, cut. Then we need to name the file before it will save.
Now we have it in our available uploaded images.
Add to canvas:
Zooming in I started to really notice all the flaws, this is why any old pic of the internet isn't an option, or compatible with DS.
How To: Delete an Image-
(Works very similar on PC)
Click the images menu (the 3 dots at the top right).
Then click delete:
Poof, gone!
Now that we know all the basics let's get to making!!
PC~
As always our first step is to start up Design Space, and open the Canvas:
From there we can search for an image, or images, upload an svg from our computer, or use the shapes & tools to create our own image.
I chose this image, free for all users, in DS:
I plan to make a few cake toppers using party foil, vinyl & paper. (You could use all paper if you'd like.)
Skewers, toothpick, something to stick into the cake(s).
*Colors and size up to you!
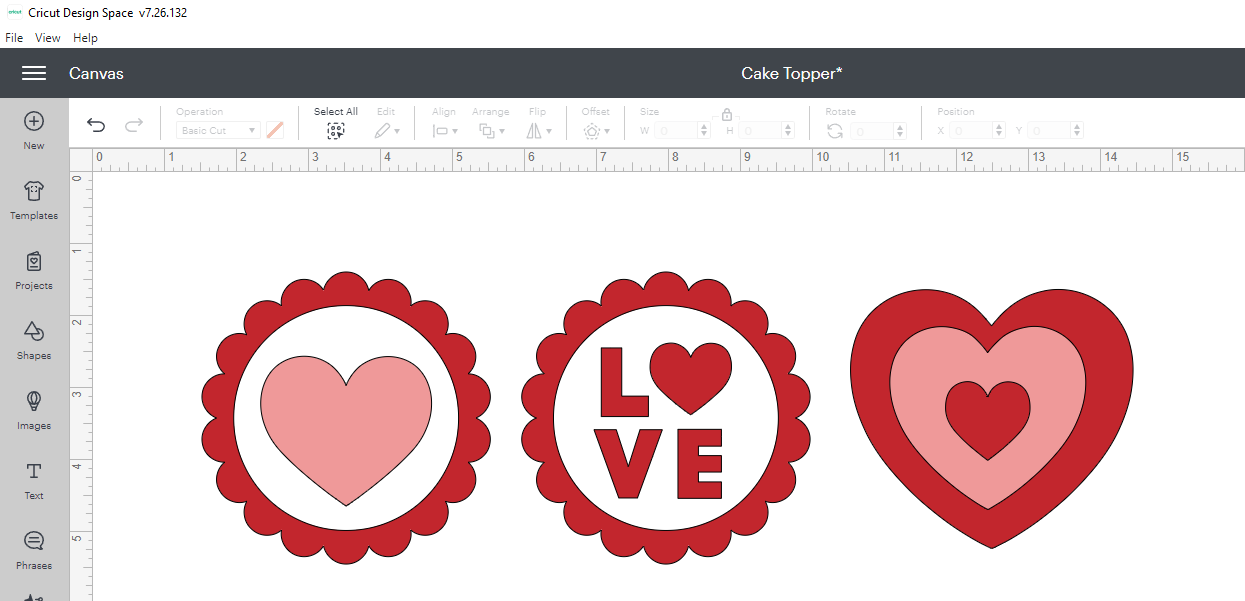
Image on the canvas:
I've change the colors to match the materials I plan to use. This isn't necessary, but it helps to visualize your finished project. (I do end up changing them again, after I change my mind...)
What it looks like in the layers panel..
Next, I duplicated the image:
The duplicate is going on the backside of our cake toppers, to "pretty it up" & add some stability.
Then hid the top layer, over in the layers panel...
After that, I added an offset:
The offset is just for another bit of dimension to our cake toppers.
Here's a final look at our canvas, and what the final will look like:
The paper I've chosen is pink, and the offset is a Party Foil in a deeper pink. The red & white are glitter vinyl. Lastly the backing is that same pink cardstock.
Now that I'm ready to cut it all, here are the materials I've chosen (listed above):
Click Make It:
As you see here we have 4 mats to prep:
White Glitter, Party Foil, Paper, Red Glitter. It will prompt you through. I started with the third to do paper first, then both glitters, finishing with the party foil, just so I didn't have to change settings as much.
Mat 3-
To load your mat, follow the on screen and machine prompts.
Press the arrow button to load, and the "C" Cricut logo, or Play button to begin the cut.
Progress:
One down, 3 to go!
Next Mat: Red Glitter
Same process, but change your setting (see how below).
Back to the top with Mat 1: White Glitter
Lastly, the Party Foil-
Material Settings:
Turn dial on machine to custom, follow on screen prompt. Browse all, search Party Foil, Select.
Everything is cut, now I need to put it all together!
Once finished, click Done it will take you back to the Canvas.
Here's a simple pieced together video of the cutting process:
As you'll see in the end of the video the Party Foil wasn't adhered to the mat well.
When that happens take these steps:
Pause the cut (fix material if possible, un-pause by re-clicking the pause button, continue as normal)
If not fixable, as was the case here-
Unload mat
In DS cancel the cut
Fix the material, and start again.
Clicking Done brings us back to the Canvas, you can Save, close out DS, or refer back to the screen to weed (if applicable) your vinyl, adhere your layers in the correct order, put the final project together, etc.
Put it all together:
The parchment paper trick is great for aligning before you're committed and stuck! (Sometimes I eyeball it, sometimes I do this.)
Place the vinyl (with transfer tape if you're using it, with this project I didn't think it was needed) on the parchment paper, with just a sliver of the sticky bit off the parchment.
Align, then adhere the exposed piece.
Slowly peel back the parchment paper & adhere the rest of the vinyl piece.
Tada!
Repeat as many times as necessary...
These glitters are so pretty!
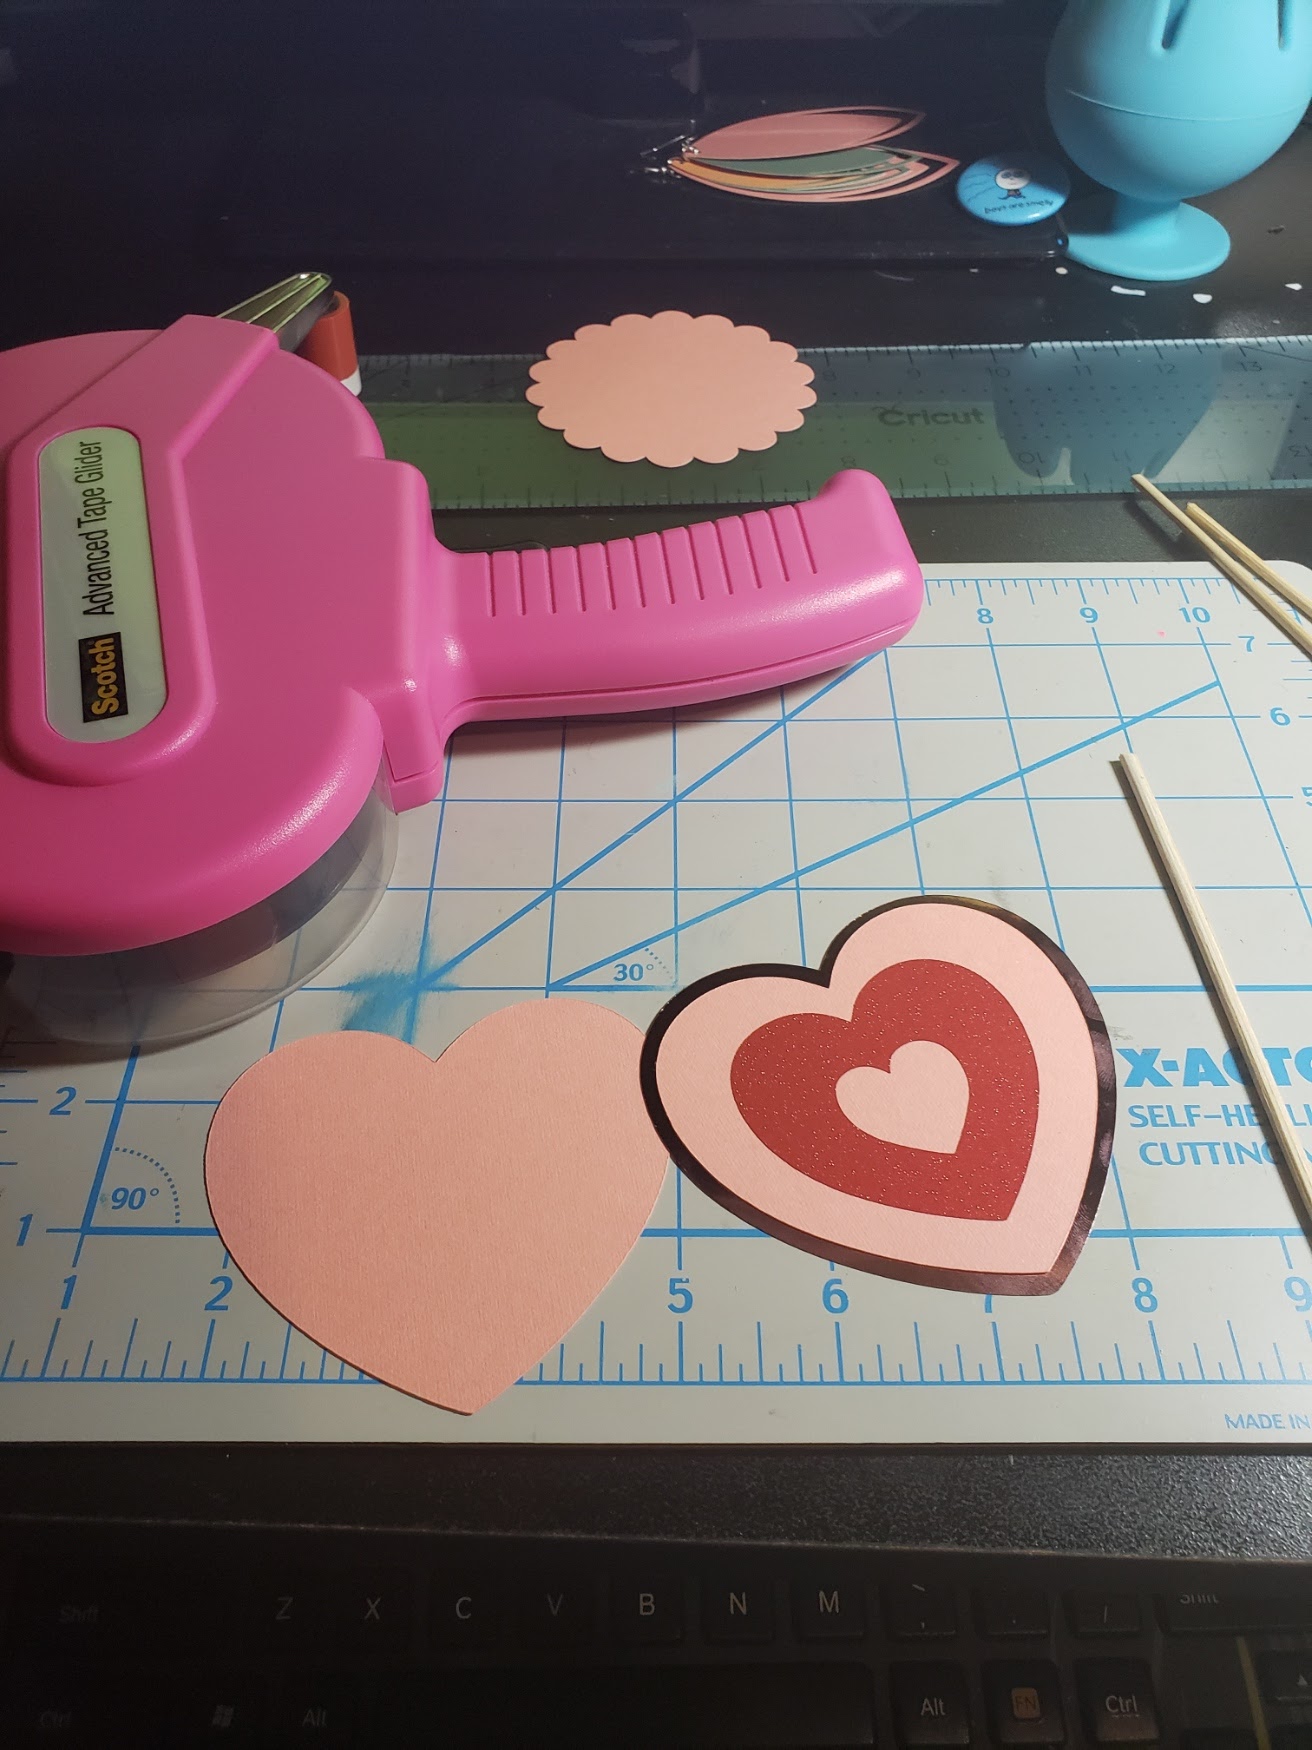
Once that's done we need to adhere our main piece to the Party Foil! I used an ATG for this, but you can use whichever adhesive you like best.
Last, I again used the ATG to adhere the skewer to the backing, and add our main piece to the front:
These turned out even better than I had planned!
Backs:
All put together:
Android Project:
Supplies:
Tee Shirt (Your preference, mine is a Time & Tru L/S Tee from Walmart)
When you first open up DS on your Android Device it'll look similar to this:
**Click on any photo to enlarge.
Click Canvas, and we're ready to get started...
I chose this Access image in DS:
Added it to my canvas, and sized it to my needs:
From there, click make it, at the top right, and we're ready to go!
Here we see our prep screen, it's going to prompt me to pair my machine.
For most HTV/ Iron On don't forget to mirror!!
This step (pairing) was super easy. I turned on my machine, clicked the + and after it did it's thing, clicked yes/okay.
Because I had left the dial on the machine turned to custom (from yesterday's project) it's prompted me to select a material.
Since I had used this Flock HTV before I knew what worked best for my machine.
Some brands/types will tell you the setting on the packaging, or online. Occasionally you'll have to do a test cut.
When I do a test cut I pick a 1/2in or so shape, and load my mat, then cut. Adjust until it's cutting correctly.
Make sure everything looks right, and load the mat!
I'm using the (pink) Fabric mat because my green (Standard Grip) mats aren't sticky enough for this material. So far I've not had any issue.
*Notice I didn't bother changing the project on screen to the color of my material. It's one simple layer, so I didn't feel the need to change the image on screen, I knew what color I was loading on the mat. The screen colors didn't matter here.
Loaded and ready to cut:
Cut in progress...
Unload prompt:
Before I unload I like to make sure it's cut through the material. This has, without issue.
If it hadn't you can press the "C" or Play button and it will run through the cut again. This only works if you have NOT unloaded the mat.
We've unloaded the mat, and the check mark over our project lets us know this mat has been cut.
From there you can go back, cut more, or exit.
Now let's put it together:
I like to start my Heat Press, and get it warming up while I weed the vinyl.
Craftables vinyl's weed extremely easily.
I like to press for the center line. Some people use a tee shirt ruler. Do whatever works best for you.
Unfold the shirt, and press (with nothing on it) for 5-10sec to pre-heat it, and get out some of the moisture.
Next, line up your design:
Press according to manufactures instructions:
This is a cool peel, so we wait...
Finished project:
The Flock is a bit more visible in person:
Yay! We've finished a project! Now that we have all the basics down we'll have one final refresher course, and cover all the small details we haven't here, as well as go over any further updates!


No comments:
Post a Comment
Hey Y'all!
Have a great day!