Hey Y'all!
Now that we know all the basics, and then some, let's play around in Design Space!
Need to catch up? Start here:
http://craftinwifescreations.blogspot.com/2022/12/how-to-cricut-design-space-on-pc-android.html
http://craftinwifescreations.blogspot.com/2023/01/how-to-cricut-design-space-on-pc-part.html
First, let's start with font manipulation, and all the possibilities there-
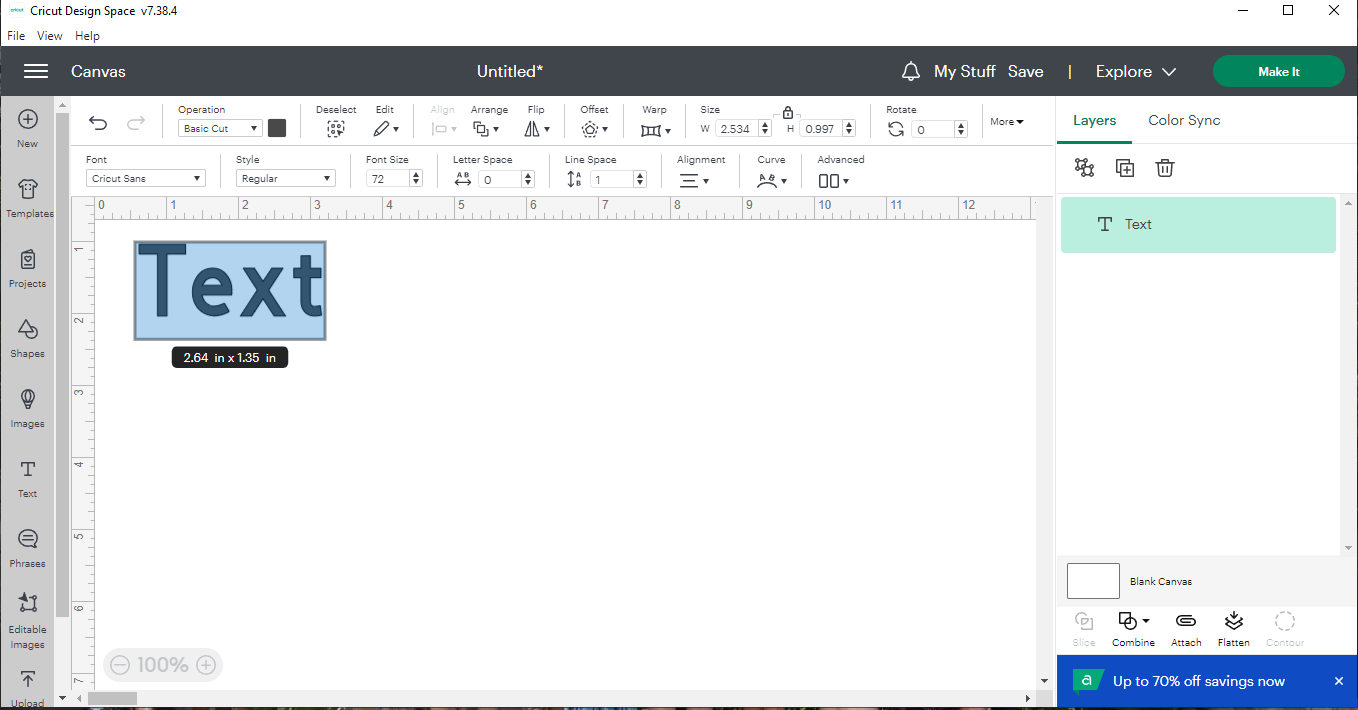
1) Design Space always defaults to Cricut Sans Text/Font.
2) Once you double click your text, you can type out whatever you'd like. The font box will also come up:Tab 1 is Cricut Fonts
Tab 2 is the fonts you have installed
Tab 3 is anything you've bookmarked
Tab 4 is any fonts you've used recently
You can resize your text by clicking any of the corners, or mid sections, with your mouse and dragging. You can also resize your text by clicking on it and using the top tool bar: Font Size, Letter Space, and Line Space, as well as size (above the text tools) are all helpful in getting your sizing just right.
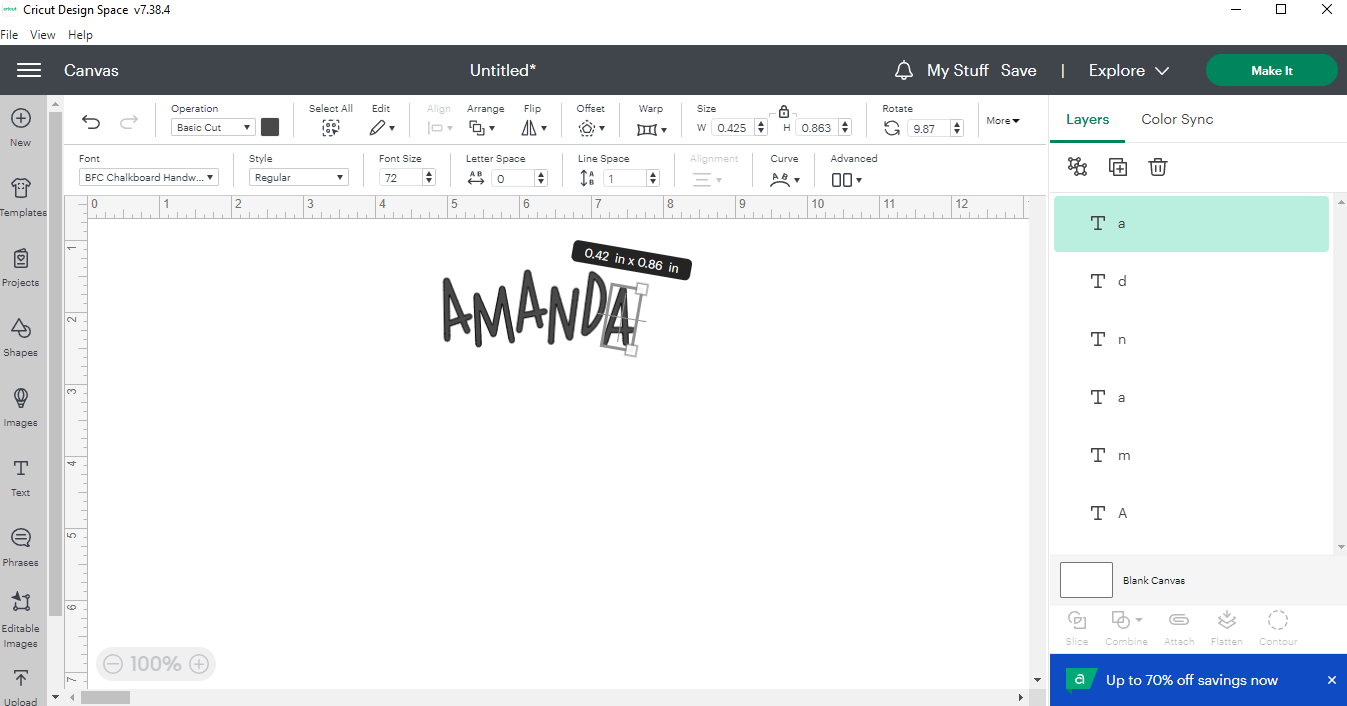
3) Next is the "style" either a regular or writing font. Writing fonts are great for use with the markers, or pens!
4) Alignment tools, we covered these in the How To Design Space Blog (linked above).
5) Curve- You can set the curve of the text where ever you'd like by using the slider.
Ungroup to Letters, Lines, or Layers.
7) Now each letter, once ungrouped, is it's own image, and can be moved independently.
8) Offset. (We've went over this before too.)
9) In the layers panel, you can see each letter is still independent, so we'll unite them, and then group the (now 2) images. Uniting them will keep the placement and cut out as one, rather than each individual letter cutting out of order. This is especially helpful with script/cursive fonts.
There's so much you can do with fonts! If you have any questions leave them in the comment section below!
Image Editing 101-
There's a lot to cover here, but I'll touch on some basics and feel free to leave a comment on anything you'd like to learn!
In this section of the How To, I'll be editing one image throughout.
Here's the image:
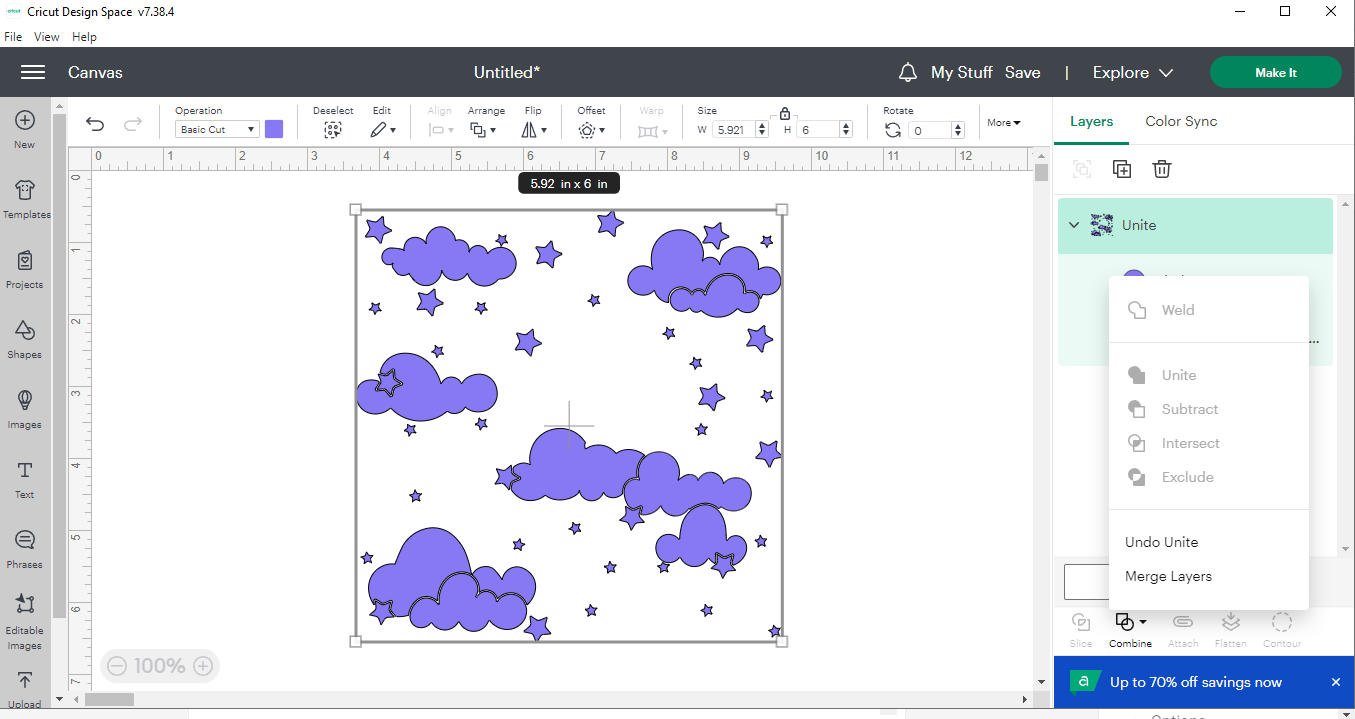
First I'm going to contour out the Hot Air Balloon, it's cute but I just like the stars and clouds...
We've gone over contour in the earlier Design Space blogs, if you need to refer back to them.
Now that the balloon is gone, we have a funky bit of clouds in the center we need to fix...
To do this I added a circle to my canvas, sized in manually to fit in the space, then united the two images.
Here's the aforementioned circle in place:
I then decided an offset might look nice, and played around with the scale to get the sizing I wanted.
That open space, where the balloon was, needed something though. A short name, or initials, fit perfectly depending on the sizing and font you choose.
I also added the same size offset to the name as we used on the image, and changed my colors to match.
Then I united my black offsets, and my purple images so they'd cut in 2 pieces, rather than 4.
Centering them, just for the visual.
What we started with, and what we came up with!
Have fun playing around in Design Space, you can even download it and begin before you purchase your machine!
Have a great day,
Craftin' Wife


No comments:
Post a Comment
Hey Y'all!
Have a great day!