Hey Y'all!
Welcome to part 2A (PC) of this five part How To: Cricut Design Space Series! In part one (HERE) we went over how to download design space, and the home screen. In this part I'll be discussing the canvas (new project), and it's terms, functions, etc.
Because this part was so big/long I'll be uploading the Android Canvas blog tomorrow, as part 2B. I apologize for the inconvenience.
Upcoming Parts:
Part 3- How To: Upload your own images, reputable places I visit for files.
Part 4- How To: Complete a project:
A) Cut Vinyl, Paper
B) Print then Cut
C) Draw
Part 5- Misc, anything we haven't gone over, answering any questions. Feel free to leave a comment here, or on any of my social media about any design space functionality.
PC CANVAS~
Here we go!
If you've caught up from Part 1, just click on either New Project on the top right, or Canvas on the left in the hamburger menu to get started.

*That hamburger menu (from part 1) is still here, and all it's functions remain the same.

Starting from the top left hand side:
1) New~ Opens a new canvas.
2) Templates~
Pictured is just a small selection of all the templates available.

Templates are just that- they give you an idea of the spacing and sizing for your project. I don't use them often as I just take my own measurements and work from them. I don't find the templates accurate, and they never have exactly what I'm looking for. It does look like they've added more, but I'm used to working without one.

3) Projects~
You can search a wide variety of projects from this menu, either to recreate exactly, or get inspiration. From Birthday Cards, to Family Vacation Shirts, and anything else you can dream up.
Currently the main Projects screen:

4) Shapes~
I use these far more than anything else. Especially the basic shapes, to slice (more on that later in this blog).

5) Images~
This is the beginning of just about any project! Finding an image, or images to create with.


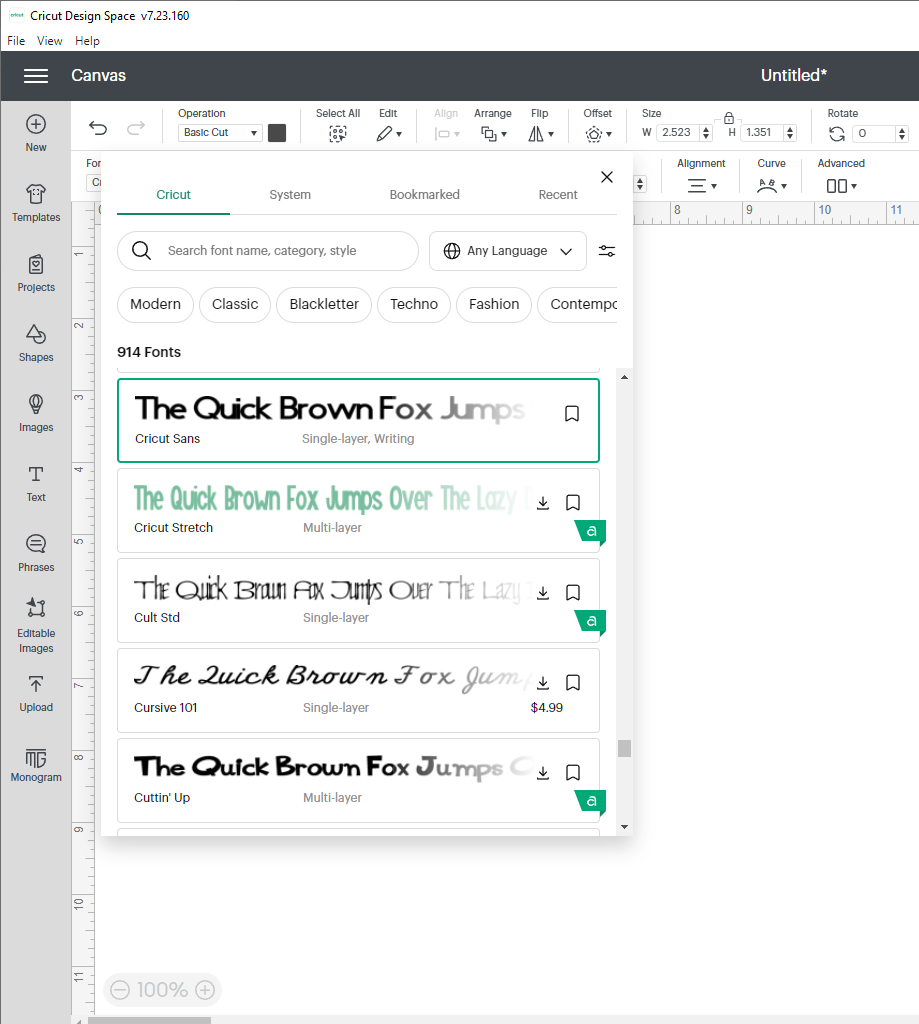
6) Fonts~
There are so many possibilities with fonts that I suggest you really take some time to play around with each of the options to manipulate fonts, and get to know what they do and how to use them.
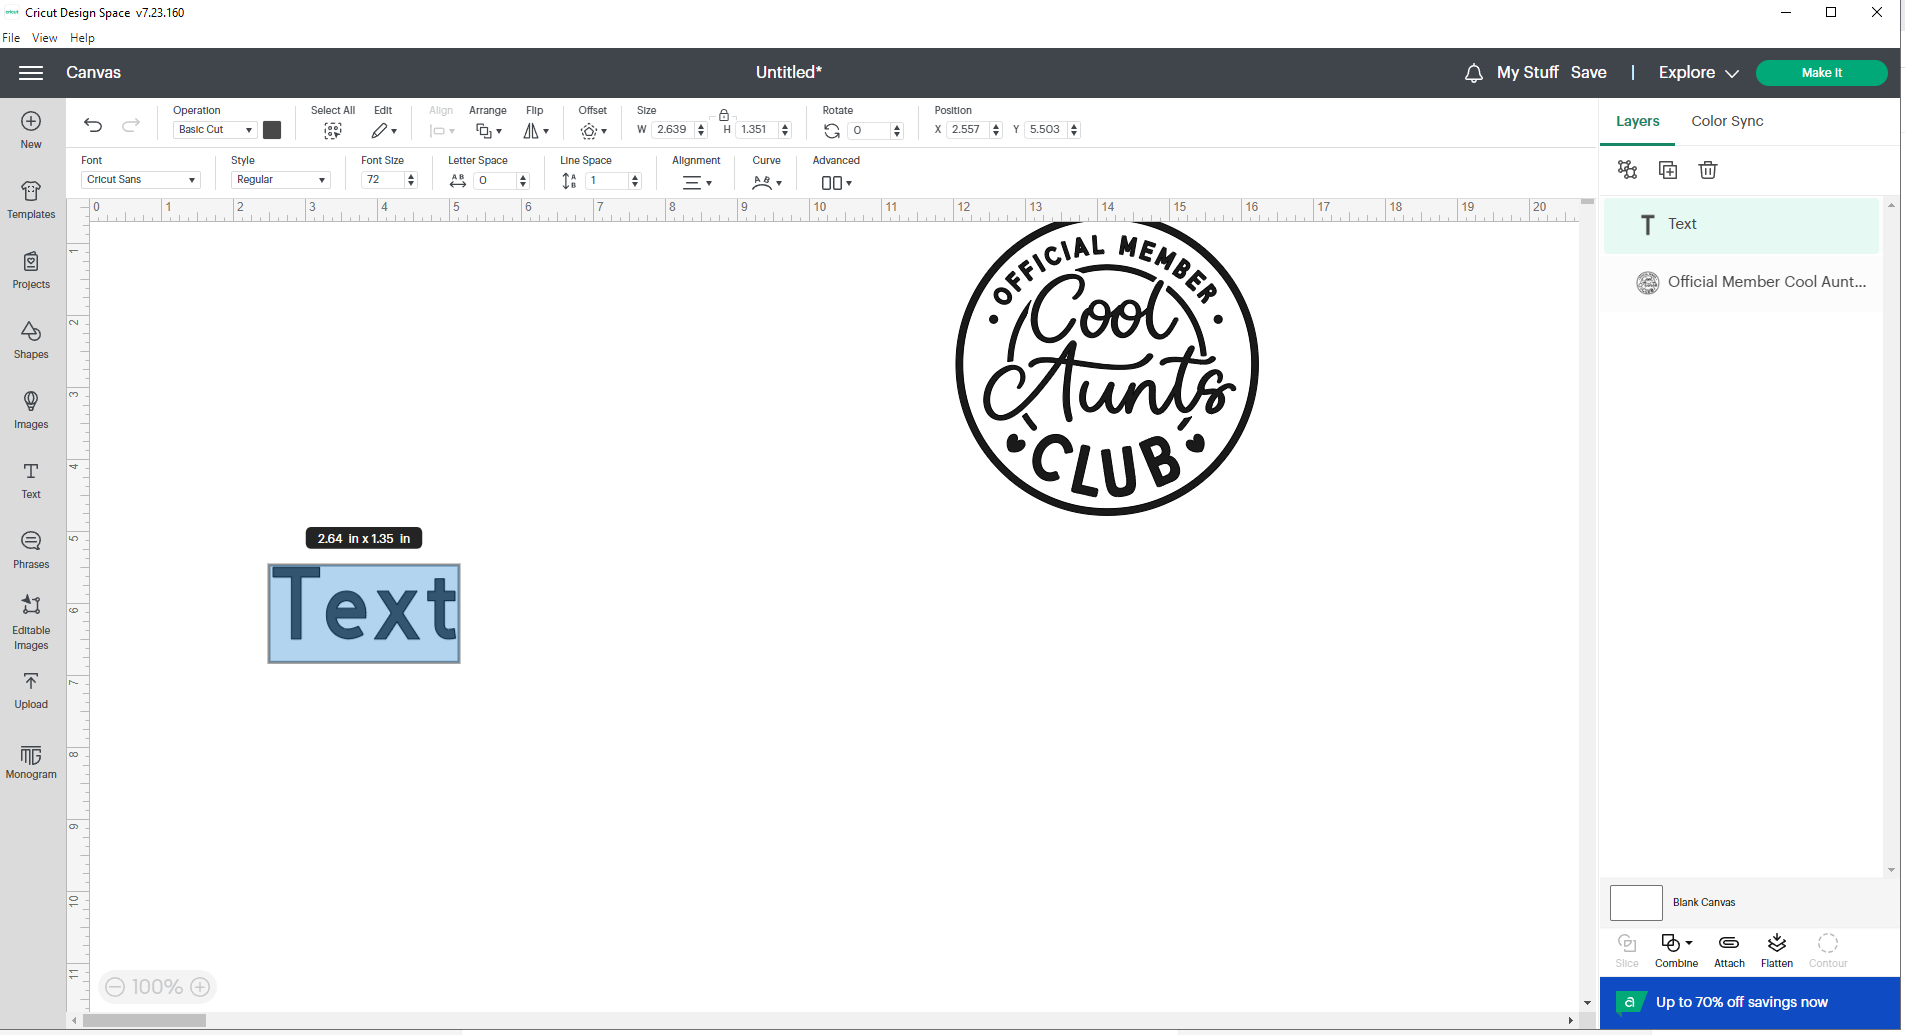
For a bit of a how to within a how to I typed out my nickname:
A) Font choice, curve, letter spacing.
B) Then under advanced I ungrouped to letters and moved them around manually and added an offset.


7) Phrases~
Similar to images, you can search a wide variety of phrases, rather than type them out and manipulate the text yourself.

Added to the canvas & searchable in the same way as a regular image, or phrases, editable images are unique in that they are easily edited. The blue outline portion of the image is "clickable" and from there you can edit it easily.

Simply double click on the editable portion, delete what's there and add your own word, name, or phrase.


9) Upload~
We'll cover this in great detail in part 3!

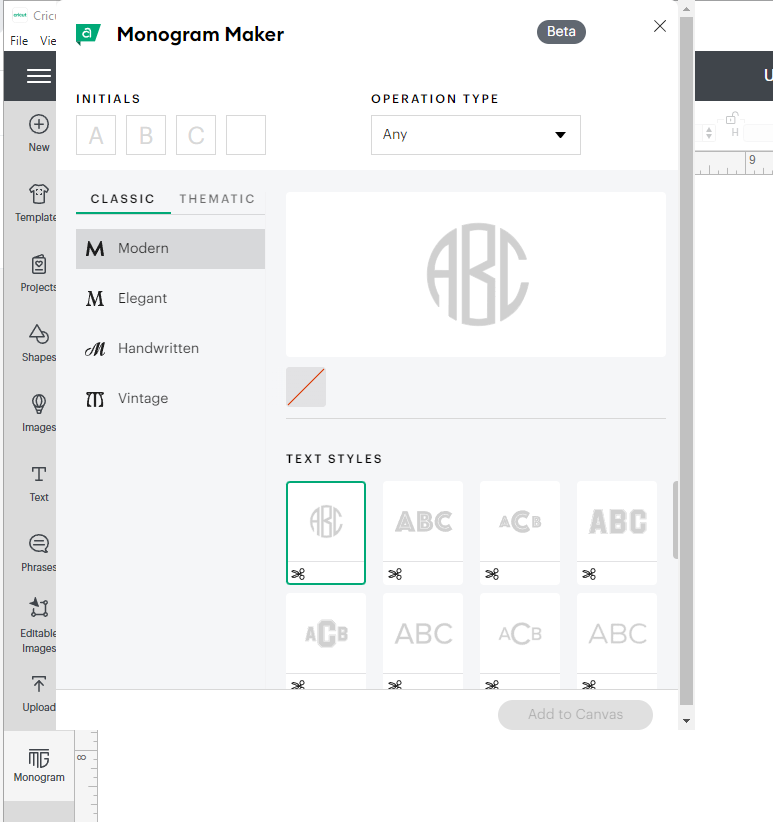
10) Monogram~
For access members only.
It's a fun little feature, and if you have access I'd suggest you check it out. If you don't have access you can easily create a monogram with fonts, and frame images, or shapes.
----------------------------------------------------------------------------------------------------------------
Fresh Canvas:
To show the top row canvas options I wanted to start fresh. Because I hadn't saved, the Cricut prompted me:

TOP Bar:
With nothing on the canvas, the bar is greyed out. With nothing there (on canvas) there's nothing to do, thus we have no options.
To access functionality I've added a circle from the shapes menu.
Our Operations are:
Cut- Basic~ (vinyl type, paper, etc doesn't matter here, just select this option for anything your going to cut).
Draw- Pen, Foil, Score~ seems fairly self explanatory. All the writing/pen options will show up once clicked on.
Print then Cut- This is for images your going to send to your printer to print, then cut out with the Cricut. I strongly suggest you do a calibration first! (See part one for how to.)
Guide- Similar to a template, but you set the parameters. Will not be part of the project.
*We'll go over these in more detail in part 4, when we use each operation type.

Edit- Cut, Copy, Duplicate, Delete. Similar functionally to most every program.

(Change the color next to the operation type. The color on the canvas can really help when working on multiple layers, but it's the material you load on your mat that matters.)


Notice you can get most functions more than one way in DS.
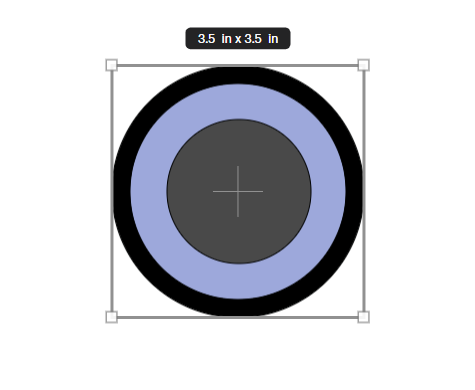
Here we've moved the light blue to the back, and aligned the images together, center.

Not any different with a circle.

There are a few options in offset, and a sliding scale for size. Here I've added a .25 rounded offset in black.


------------------------------------------------------------------------------------------------------------
Layers Panel:
This is where you can see all the images, and it's layers, that you currently have on your canvas.
In this first image it show we have 3 separate layers, two circles and an offset.


Bottom Right:
Blank Canvas- Click on this to change the canvas color, the option becomes available at the top of the screen.


Slice, Combine*, Attach, Flatten, Contour.
*Combine is new and has more functionality. Previously just Weld.

Slice- Can only be done with 2 layers. It's currently greyed out because I have 3 layers in the circles image.
Lets select 2 new shapes for this:
Square, and star!


Combine-
All can be done with multiple layers, unlike slice.
Weld, Unite- Similar however once saved weld is permanent, unite can be undone.
Subtract- Similar to slice, subtracts the overlapping portion.
Intersect- Only keeps the intersecting portion of the images.
Exclude- Takes out the intersecting portion of the images.


Attach-
In brief, the Attach tool keeps your same color shapes/images in the same arrangement when you send the design to the mat to cut. Group only keeps a group together on mat, Weld/Unite makes the image one. I like to look at it as attach is a paperclip, and weld/unite are glue.

Sent to mat.


Flatten-
Flatten= Print then Cut. Flatten converts an image from a Cut image to a Print image, leaving just an exterior cut line around the outside edge. If you flatten a single layer, it will just turn that layer into a printable image. If you flatten multiple layers, it will combine all of those layers into a single printable image.

Contour-
Hide select portions of an image with contour. Foe example say we don't want the hearts in this image:

We'll click contour, then click on the pieces we want to hide.


I look forward to sharing How To upload your own images with you in part 3 on January 23rd! Part 2B Canvas for Android will be tomorrow.
Have a great day,
Craftin' Wife
No comments:
Post a Comment
Hey Y'all!
Have a great day!