Hey y'all!
As a refresher here are parts one & two:
In part one we went over the home screen and all it's functions, and in part two we went over the canvas operations.
https://craftinwifescreations.blogspot.com/2022/12/how-to-cricut-design-space-on-pc-android.html
https://craftinwifescreations.blogspot.com/2023/01/how-to-cricut-design-space-on-pc-part.html
https://craftinwifescreations.blogspot.com/2023/01/how-to-cricut-design-space-on-android.html
Admittedly, now that I'm an access member I rarely search for SVG's elsewhere. When I do I really like:
designbundles.net
https://store.caluyadesign.com/collections/newly-added-free-svg
https://www.creativefabrica.com/
https://lovesvg.com/ref/CraftinWIfe/ (affiliate link)
*If you plan to sell your creations be sure to check the commercial licenses, and policies from each vendor/site/seller, also know the licensing laws for characters/shows/movies, etc.*
DS on PC-
Let's start from the beginning, and do a quick download of an SVG:
This SVG is free for personal use, and can be found at caluya design, linked above.
Continue through the checkout process, then this will pop up:Click to download.
My files go right into my downloads folder on my PC.
Right click to bring up the menu, then click extract:
The extracted files will then appear, you'll click on this folder from DS to access the images in the folder.
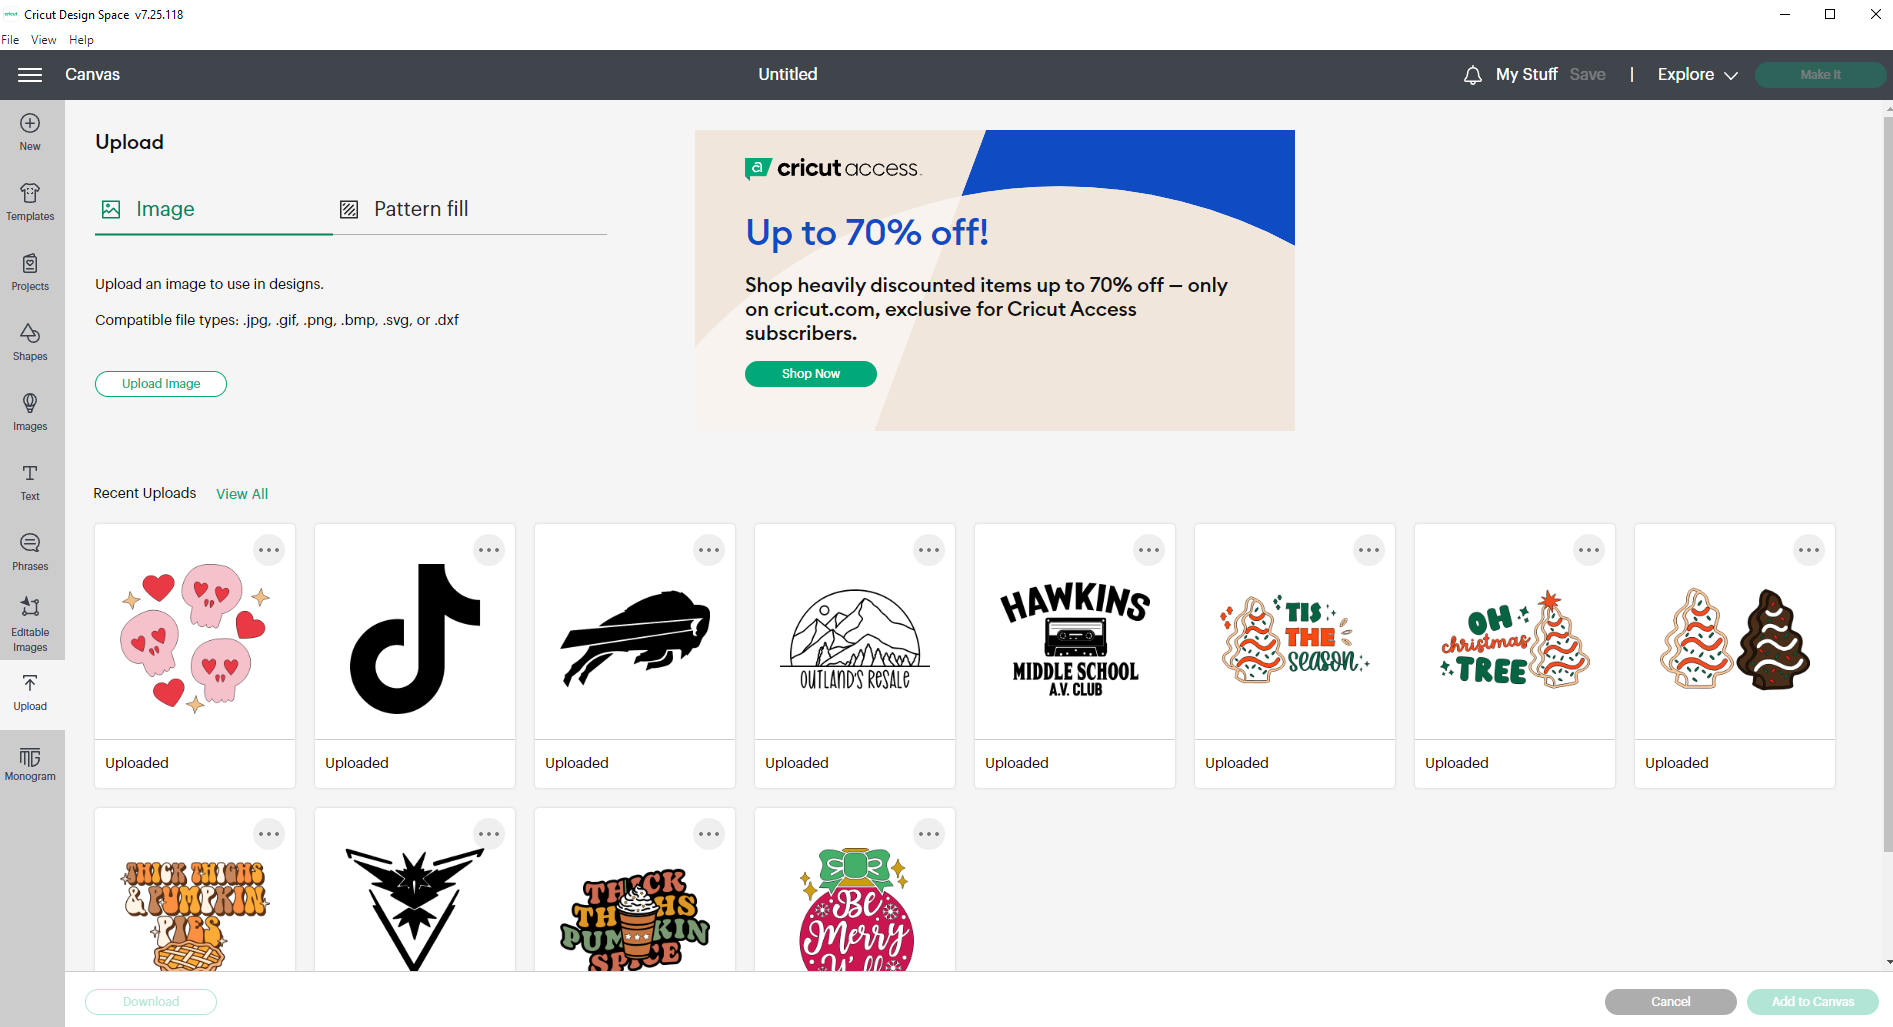
Now let's get that design into Design Space and onto our canvas:From the canvas, click on Upload-
This screen will appear, with all your previously uploaded images. The Upload button is on the left.
Here you can either drag & drop, or browse for the file you want:
Once we click on that folder, and it opens up we double click the image (SVG with the symbol on the bottom right) and it's imported to Design Space.
Some files may need cleaned up, or the background removed, that would be done here. All those tools are to the left.For example, I used this picture from a previous blog already on my PC. I also use this process in the Android section below.
This is a poor image to attempt this with, but you can see the editing options, and if I did nothing to it the cut option is just a rectangle.
This is also where some images will give you either a CUT or PRINT option, you'll see a small preview like you do here:
One we click the upload button our image is available and we can add it to our canvas:That's it! We're ready to create with this image.
There are a lot of possibilities with quality files/images/SVGs.
In the Android portion I show cleaning an image up, and it's hard to see in the small photos, but this google searched image just isn't cutting it. The lines are jagged, and the image just wouldn't be a nice/clean cut. I knew that going in, it's just an image from a clipart search, and I deleted it after the How-To. It works for our intended purpose though.
Image Types (Supported by Cricut DS):
SVG images are the most common type of cut file to use with Cricut Design Space. SVG stands for “scalable vector graphic”. That means you can make the SVG image as large or small as you want, without it looking pixelated or blurry.
PNG stands for Portable Network Graphics. It’s a raster image file type. This means that all PNG images and graphics are made up of pixels. Therefore they can’t be scaled to any size as vector graphics can.
JPEG is a commonly used method of lossy compression for digital images, particularly for those images produced by digital photography.
DXF is short for Drawing Exchange Format or Drawing Interchange Format and is a type of vector file. Engineers, designers and architects often use the DXF.
You can upload your very own original art to Cricut Design Space too! Whether you've drawn something on a piece of paper or digitally, save it as either a JPG, PNG or SVG file an import it in the same way as you would a downloaded image.
Android:
As previously stated I hardly ever work from my phone, and really wouldn't suggest it if you have another option.
Again from the canvas-
Upload is at the bottom, toward the middle.
Using the remove tool (very first tool at the bottom of the screen) we'll click on/remove all the white bits. If we didn't we'd end up with a square block like in the example above (in the PC section).
Once that's finished we'll chose our operation type, cut. Then we need to name the file before it will save.
Now we have it in our available uploaded images.
Zooming in I started to really notice all the flaws, this is why any old pic of the internet isn't an option, or compatible with DS.
How To: Delete an Image-
(Works very similar on PC)
Click the images menu (the 3 dots at the top right).
Then click delete:
Any questions so far? Ask in the comments below and I'll answer there ASAP, and add them to Part 5!
Have a great day,
Craftin' Wife


No comments:
Post a Comment
Hey Y'all!
Have a great day!