Hey Y'all!
Let's refresh on Design Space! There have been a few updates as well...
Let's go over the updates on mobile first:
There have been few updates, mostly bug fixes and other improvements. The newer features are Auto Mirror, which auto mirrors (amazing huh?!) once iron on has been chosen in the materials menu. I see this benefiting new users, but as for myself I'm used to remembering, and some brands I use don't mirror. So now I'll have to remember to turn it off for those.
The only other new feature is Convert to Layers (access members only), which I haven't played around with yet but I can imagine it being a heck of a time saver. This feature allows you to upload an image and select the Multiple Layers option, where it will then separate the layers by color.
PC Updates:
Just an update to the help menu, and some bug fixes.
So, Refresher Course??
Part One-
The home page does look a little different now:
Things are a bit easier to find, and there's less confusion about where things are, so that's nice.
Since the learn.cricut.com no longer works they've added all the helpful videos to a tab on design space:

Okay now that we've seen the new home page, let's get crafting!
If you were around for my previous series in 2022-2023, the look is different but much of the functionality remains the same.
*Previous Series:
https://craftinwifescreations.blogspot.com/2022/12/how-to-cricut-design-space-on-pc-android.html
https://craftinwifescreations.blogspot.com/2023/01/how-to-cricut-design-space-on-pc-part.html
https://craftinwifescreations.blogspot.com/2023/01/how-to-cricut-design-space-on-android.html
https://craftinwifescreations.blogspot.com/2023/01/how-to-cricut-design-space-on-pc-and.html
https://craftinwifescreations.blogspot.com/2023/02/how-to-cricut-design-space-on-pc-part.html
https://craftinwifescreations.blogspot.com/2023/02/how-to-cricut-design-space-on-android.html
https://craftinwifescreations.blogspot.com/2023/02/how-to-cricut-design-space-on-pc.html
To get started click on either New Project on the top right, or Canvas on the left, from home screen.
The new canvas has been simplified, and streamlined from the previous version(s).
1) New~ Opens a new canvas.
2) Templates~
Pictured is just a small selection of all the templates available.
This is the standard adult apron, for example.
Templates are just that- they give you an idea of the spacing and sizing for your project. I don't use them 99% of the time as I just take my own measurements and work from them. I don't find the templates accurate, and they never have exactly what I'm looking for.
The top of the screen is where your alerts will be, for example this one tells me that the template is not part of the save/cut for my project.
3) Projects~
You can search a wide variety of projects from this menu, either to recreate exactly, or get inspiration. From Birthday Cards, to Family Vacation Shirts, and anything else you can dream up.
Currently the main Projects screen:
4) Shapes~
I use these far more than I ever expected. Especially the more basic shapes, to slice (more on that later in this blog).
5) Images~
This is the beginning of just about any project! Finding an image, or images to create with. There are over a million options!
6) Text & Fonts~
There are so many possibilities with fonts that I suggest you really take some time to play around with each of the options to manipulate fonts, and get to know what they do and how to use them.
Since the previous series they've added the warp feature, so we'll cove it first. It is access only.
For a bit of a how to within a how to I typed out my nickname:
A) Font choice, curve, letter spacing.
B) Then under advanced I ungrouped to letters and moved them around manually and added an offset.
If you'd like a more in depth of just the font section, let me know in the comments below & I can cover it in the future!
7) Monogram~
For access members only.
It's a fun little feature, and if you have access I'd suggest you check it out. If you don't have access you can easily create a monogram with fonts, and frame images, or shapes.
8) Upload~
Upload an image, if you'd like help with all the options within this feature leave a comment below!
Now that we've gone over the side bar, lets tackle the top bar!
Our Operations are:
Cut- Basic~ (vinyl type, paper, etc doesn't matter here, just select this option for anything your going to cut).
Draw- Pen, Foil, Score~ seems fairly self explanatory. All the writing/pen options will show up once clicked on.
Print then Cut- This is for images your going to send to your printer to print, then cut out with the Cricut. I strongly suggest you do a calibration first! (See part one for how to.)
Guide- Similar to a template, but you set the parameters. Will not be part of the project.
Select/Deselect, I never use this and just click on my image with the mouse or from the layers panel (upcoming in this blog).
Edit- Cut, Copy, Duplicate, Delete. Similar functionally to most every program.
Here we've duplicated the circle, resized it, and changed the color.
(Change the color next to the operation type. The color on the canvas can really help when working on multiple layers, but it's the material you load on your mat that matters.)
Align-
Options when right clicking the image:
Arrange-
Notice you can get most functions more than one way in DS.
Here we've moved the light blue to the back, and aligned the images together, center.
Flip-
Not any different with a circle.
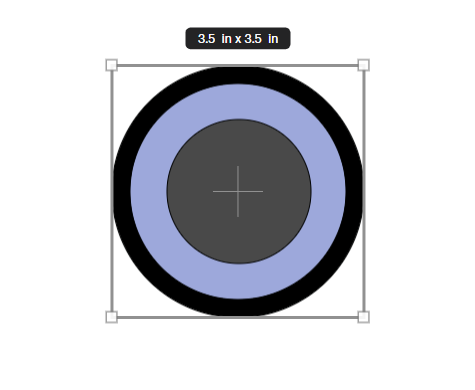
Offset-
There are a few options in offset, and a sliding scale for size. Here I've added a .25 rounded offset in black.
Create a sticker, does just that. it makes your image a sticker- ready to go. And we mentioned Warp above!
Lastly in that top bar are the Rotate & Position options, admittedly I never use these. They are great for moving a layer just a tiny bit at a time, or if you need something in an exact space.
Layers Panel:
This is where you can see all the images, and it's layers, that you currently have on your canvas.
In this first image it show we have 3 separate layers, two circles and an offset.
In image 2, we've selected all three circles and clicked that first option- Group/Ungroup. Now our circles will move as one on the canvas.

In this third image I've clicked Color Sync so now it is open and I've decided I want that grey circle black to save time/material when cut. This is especially useful in larger, more colorful images to use one shade of a specific color as opposed to multiples.


Bottom Right:
Blank Canvas- Click on this to change the canvas color, the option becomes available at the top of the screen.
Here I've changed the canvas color to pink:
Slice, Combine*, Attach, Flatten, Contour.
*Combine is fairly new and has more functionality. Previously just Weld.
Slice- Can only be done with 2 layers. It's currently greyed out because I have 3 layers in the circles image.Lets select 2 new shapes for this:
Square, and star!
Now that we have two layers selected, slice is available. Slice works similar to a cookie cutter, and you're cutting that shape out of the other. This will leave you with your new design, as well as the "cookie cutter" and the piece you've sliced out, on your canvas. You can either hide the spare pieces by clicking the eye icon in the layers panel, or deleting them. (I find it easiest to right click, delete.)
Combine-
All can be done with multiple layers, unlike slice.
Weld, Unite- Similar however once saved weld is permanent, unite can be undone.
Subtract- Similar to slice, subtracts the overlapping portion.
Intersect- Only keeps the intersecting portion of the images.
Exclude- Takes out the intersecting portion of the images.
Image placement for this example:
Weld/Unite, look the same.
Subtract.
Intersect.
Exclude.
Attach-
In brief, the Attach tool keeps your same color shapes/images in the same arrangement when you send the design to the mat to cut. Group only keeps a group together on mat, Weld/Unite makes the image one. I like to look at it as attach is a paperclip, and weld/unite are glue.
Attached.Sent to mat.
Grouped, on mat. (Placement is not kept.)
Flatten-
Flatten= Print then Cut. Flatten converts an image from a Cut image to a Print image, leaving just an exterior cut line around the outside edge. If you flatten a single layer, it will just turn that layer into a printable image. If you flatten multiple layers, it will combine all of those layers into a single printable image.
Contour-
Hide select portions of an image with contour. Foe example say we don't want the hearts in this image:
We'll click contour, then click on the pieces we want to hide.
Afterwards, this is the image we're left with!
I know this one has been a long one, but Congrats! You've made it through all of the canvas options! If you have any questions please leave them in a comment below. I'll answer them there ASAP, and in an upcoming blog.
Have a great day,
Craftin' Wife